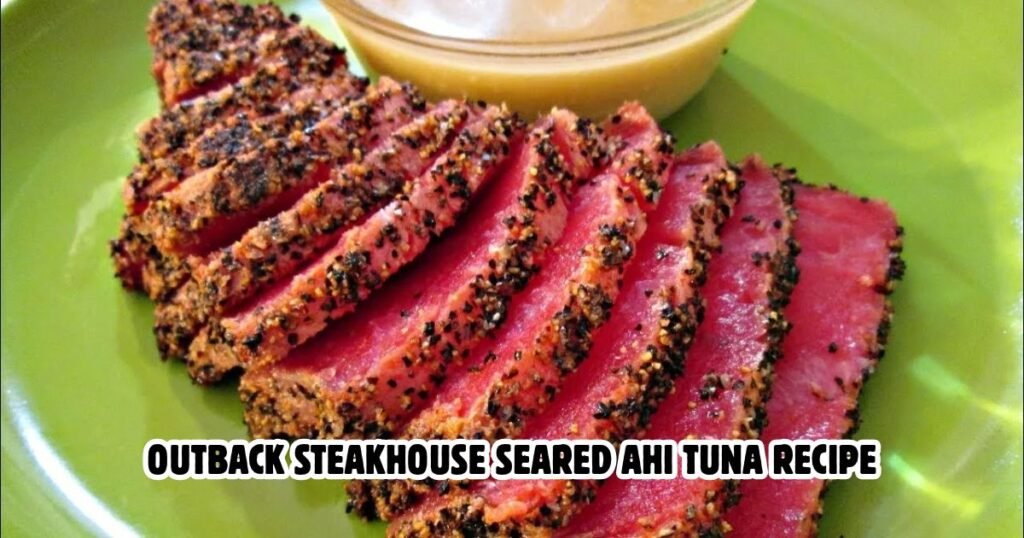
Outback Steakhouse Seared Ahi Tuna Recipe was a dare from my brother, who orders this appetizer on every visit and thinks I can’t cook tuna at home. I had a good answer. I bought two fillets from the freezer section at my local Trader Joe’s, cleared the counter, and pulled out my Lodge skillet and a stack of paper towels.
This is my homemade take on that steakhouse favorite. The trick is to sear the tuna just long enough to create a flavorful crust while keeping the center rare. Cook it too long, and the fish turns gray throughout; handle it incorrectly, and the crust can slide right off.
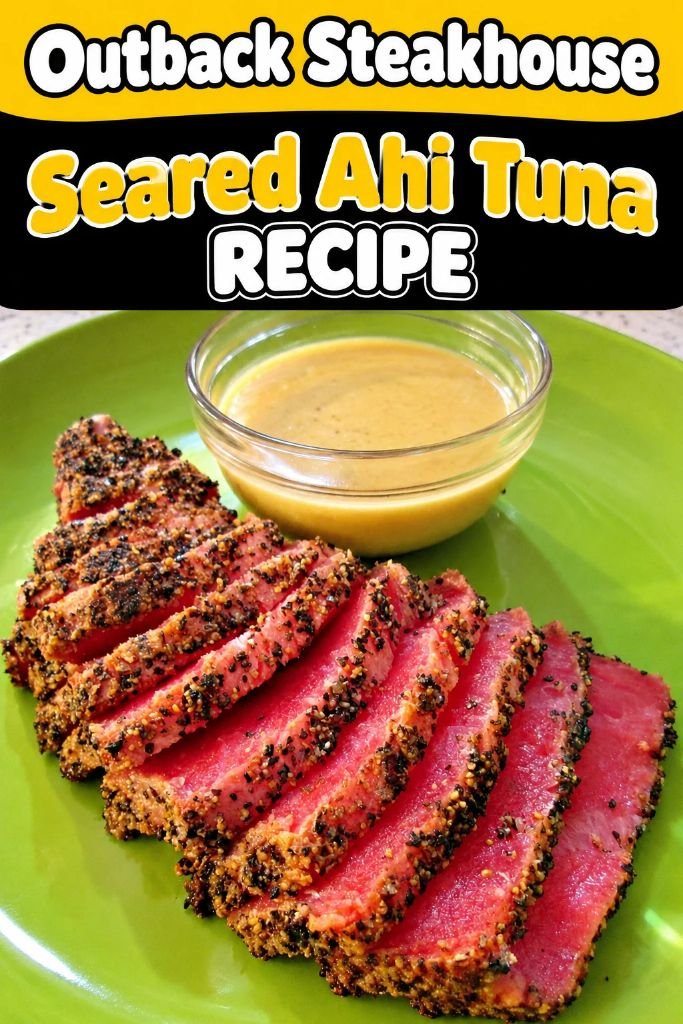
At the steakhouse, this appetizer arrives sliced thin and arranged on a plate, with a small bowl of dipping sauce on the side.
Why Some Cooks Cook Tuna Through and Why I Leave the Center Rare
Before serving this dish, keep a few things in mind. Pregnant guests, young children, older adults, and anyone with a weakened immune system should cook the fish to an internal temperature of 145°F. Anyone with a sesame allergy should avoid the crust. This recipe is best suited for people who enjoy sushi-style tuna.
The FDA advises cooking fish to an internal temperature of 145°F. However, sushi chefs and many home cooks serve tuna rare, relying on flash-frozen fish. Recipe comment sections often split on this issue.
I tested two cooking methods: one tuna steak was cooked for 40 seconds per side, while the other was cooked for 3 minutes per side. After chilling, the quickly seared tuna registered 41°F in the center and remained ruby red. The longer-cooked tuna turned beige and fell apart under the knife.
Those who prefer fully cooked fish have a valid point when it comes to food safety. Cooking fish to 145°F is the safer choice, especially for guests in higher-risk groups. Raw or undercooked fish can never be considered completely risk-free.
Ingredients for Seared Ahi Tuna
2 ahi tuna steaks, about 5 ounces each and 1 ¼ inches thick: Thickness decides how much of the middle stays raw. I buy flash-frozen blocks at Trader Joe’s and thaw them overnight in the fridge. Skip any fillet thinner than an inch.
1 tablespoon plus 1 teaspoon light olive oil: One teaspoon coats the fish so the spices cling. The tablespoon goes in the pan, where light oil handles medium-high heat. I use Bertolli. Avocado oil works in place of it, in the same amounts.
4 tablespoons low-sodium soy sauce, divided: Two teaspoons coat the raw fish so the crust sticks. One teaspoon finishes the slices. The other 3 tablespoons go into the dipping sauce. I reached for Kikkoman Less Sodium. Tamari is a gluten-free swap. Brewed with little or no wheat, it tastes slightly rounder.
1 tablespoon white sesame seeds: They toast during the 40-second sear and give the crust its light crunch. Keep them in the freezer, because old seeds smell like crayons. I buy McCormick.
2 teaspoons black sesame seeds: Their dark color shows where the crust is thin, which makes patching gaps easy. They also add a slightly bitter edge that balances the soy. An Asian market sells a 4-ounce bag for under three dollars. White seeds alone work in their place.
¾ teaspoon coarse black pepper: A coarse grind survives the hot oil. Fine pepper dust scorches and turns acrid in seconds. I crack mine fresh from a Peugeot mill set to its third notch.
A scant ¼ teaspoon white pepper: Its sharper, slightly musky heat sits behind the black pepper. Measure it scant, since it turns bitter in a hot pan. I use Simply Organic.
½ teaspoon kosher salt: The crust needs only a little, because the soy adds more. I use Diamond Crystal. Morton is denser, so cut the amount to a scant ¼ teaspoon.
¾ teaspoon garlic powder: Powder clings to the soy film and survives a 40-second sear. Fresh garlic would burn at that time. Spice Islands is my jar.
½ teaspoon ground ginger: It adds warm background spice to the crust and echoes the dipping sauce. Check the jar date, since ground ginger fades after about a year. Mine comes from Penzeys.
1 teaspoon unseasoned rice vinegar: It brightens the dipping sauce and cuts the salt from the soy. Marukan is my pick. Avoid the seasoned kind, which adds sugar. Lime juice works in its place, with a sharper edge.
½ teaspoon freshly grated ginger: Fresh root gives the dipping sauce clean, peppery heat that powder cannot match. Freeze the root, then grate it on a Microplane while it is still hard.
½ teaspoon wasabi paste, optional: A dab stirred into the sauce adds a sinus-clearing sting that cuts the richness of the fish. S&B tubes keep for months in the fridge. Add it a pinch at a time.
¼ teaspoon toasted sesame oil: A little adds a nutty aroma to the dipping sauce, since the oil is pressed from toasted seeds. Kadoya is the brand in my pantry. Store it in the fridge after opening.
Required Kitchen Equipment
- 10-inch cast iron skillet: Holds steady, high heat
- Instant-read thermometer: Confirms the cold center
- Sharp slicing knife: Clean, thin cuts
- Shallow dish: For pressing the crust
- Fish spatula or tongs: Flips without tearing
- Paper towels: Dry fillets before seasoning
- Small mixing bowl: Whisks the dipping sauce
How to Make Outback Steakhouse Seared Ahi Tuna
1. Thaw and Dry: I moved the frozen blocks to the fridge the night before, about 11 hours. Then I patted both fillets with paper towels until the surface felt tacky. Skipping this once cost me the crust. Wet fish steams, and the seeds slid right off in the pan. Now I dry each side twice.
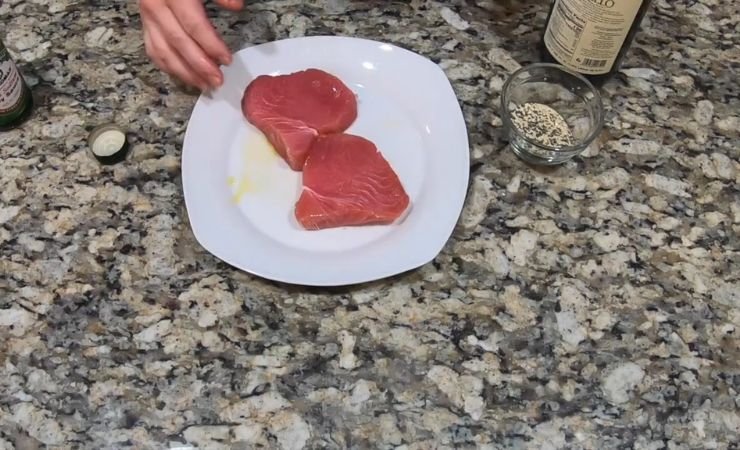
2. Oil and Soy Base: With clean fingers, I rubbed 1 teaspoon of olive oil over both fillets, working over a plate to keep drips off the counter. Then I brushed on 2 teaspoons of soy sauce, leaving a glossy film with no pools.
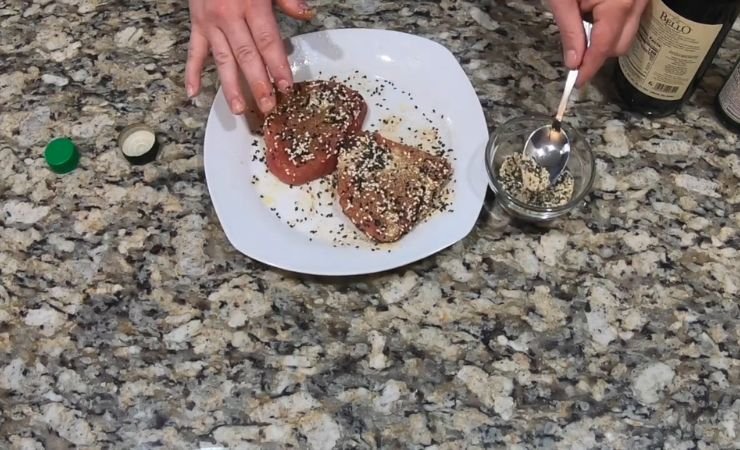
3. Press on the Crust: In a shallow dish, I stirred both sesame seeds and every spice together. Each fillet got pressed into the mix on all four long sides. Press firmly, since loose seeds fall into the pan. The coating should look speckled, with no bare red patches.
4. Heat the Skillet: My 10-inch Lodge sat over medium-high heat for 3 minutes. Then I added 1 tablespoon of olive oil and waited until it rippled and moved like water. A faint wisp of smoke means the pan is ready.
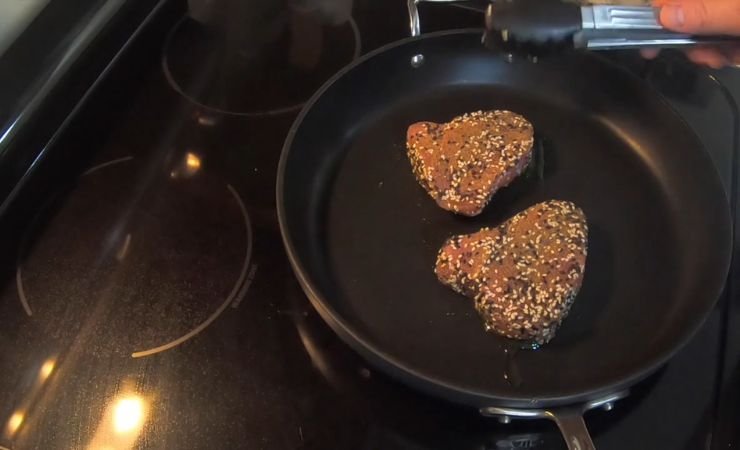
5. Sear Each Side: I laid the fillets in the pan, away from me, and seared them 40 seconds per side. Then I tipped each onto its long edges for 15 seconds. The sizzle should stay loud, and a tan band about an eighth of an inch should climb the sides.
Dark brown seeds mean the pan is too hot. Lift it off the burner for 20 seconds and wipe it.
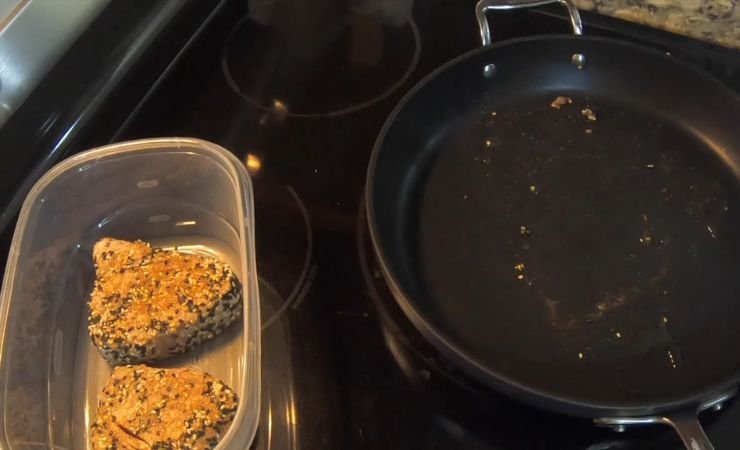
6. Chill the Fillets: I moved them to a plate and let them rest for 10 minutes. Then I covered them loosely and chilled them for 2 hours and 15 minutes. Dale texted twice during the wait. A pressed fillet should feel firm and cold all the way through.
7. Stir the Dipping Sauce: While the tuna chilled, I whisked 3 tablespoons of soy sauce with the rice vinegar, grated ginger, and sesame oil. Wasabi goes in last, a pinch at a time. I tasted it on a spoon and added nothing.
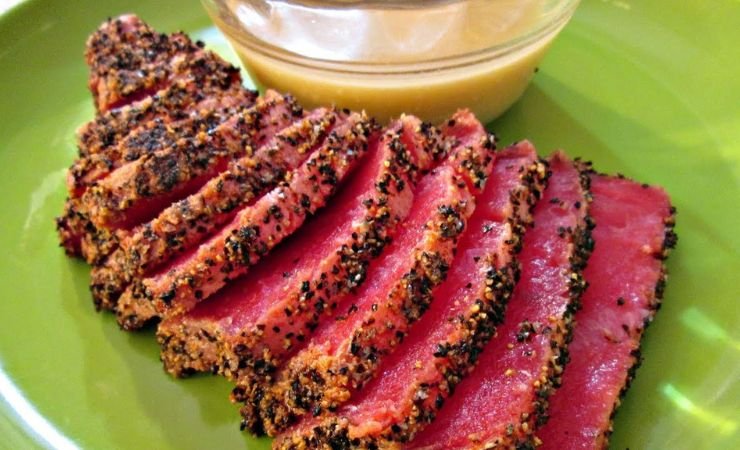
8. Slice and Finish: I cut each fillet against the grain into slices about ¼ inch thick, wiping the blade between cuts. Cold fish slices cleanly with one long pull of the knife. A last teaspoon of soy went over the top. The sauce sits alongside. Each cut face should show a ruby center ringed by a thin brown edge.
Chef Special Tips for Seared Ahi Tuna
1. Crust Slides Off When Flipping: Use a thin fish spatula and flip only once. The seared side releases from the pan on its own when ready.
2. Slices Tear Instead of Cutting: The fish is too warm or the blade is dull. Freeze the fillets 15 minutes, then slice in single long pulls.
3. Center Still Icy: Thaw one more hour next time. A frozen core slows the sear and turns the outer edge gray.
4. Dipping Sauce Tastes Too Salty: Whisk in 1 teaspoon of water and an extra ¼ teaspoon of rice vinegar.
5. Fish Smells Sour or Like Ammonia: Do not cook it. Fresh ahi smells like clean seawater, so return the package.
6. Oil Spatters Onto the Stovetop: Lay a mesh splatter screen over the skillet for the first 20 seconds of each side.
How I Customize This Seared Ahi Tuna
Wasabi Cream: Stir 2 tablespoons of sour cream with ½ teaspoon of wasabi and a squeeze of lime. It cools the sear and works as a dunk. I serve it at summer cookouts.
Peppercorn Heavy: Raise the black pepper to 1 ½ teaspoons and skip the white. The crust turns closer to a steakhouse peppered finish. I plate this one before a ribeye dinner.
Mango Salsa Topper: Spoon ¼ cup of diced mango and minced red onion over the slices. The fruit adds juice that balances the soy. It suits hot July afternoons.
Sriracha Mayo Drizzle: Whisk 1 tablespoon of mayonnaise with 1 teaspoon of sriracha. It adds creamy heat to the cold slices.
Furikake Crust: Swap the sesame seeds for 1 tablespoon of furikake. The nori flakes add a sea-salt note. I slice this version over rice bowls.
Cucumber Ribbon Salad: Toss peeled ribbons with 1 teaspoon of rice vinegar and a pinch of salt. The crisp ribbons cool each bite. I pile them beside the slices for light lunches.
What I Serve With Outback Steakhouse Seared Ahi Tuna
A cucumber salad dressed with rice vinegar and a pinch of sugar keeps the plate cool. Steamed jasmine rice catches stray dipping sauce. Pickled ginger from the Asian aisle clears the palate between slices.
For a steakhouse feel, I add a crisp wedge salad with a thin blue cheese dressing. Edamame tossed in flaky salt also works and takes 5 minutes on the stove. Both add crunch that the soft slices lack.
A glass of sparkling water with lime pairs perfectly with the dish, adding acidity that cuts through the sesame and soy flavors. On a hot afternoon, iced green tea is my drink of choice.
How I Store Seared Ahi Tuna
Keep leftover tuna whole, not sliced. Lay the fillet on a folded paper towel inside an airtight glass container, and refrigerate it for up to 24 hours. The towel absorbs liquid that would otherwise dull the surface.
Do not reheat it. Warming cooks the center through and erases the rare texture. Take the fillet out 10 minutes before slicing, so the cold flesh loosens up. Freezing it a second time dries the flesh.
Keep the dipping sauce in a lidded jar in the fridge for up to 5 days. Shake it before use, since the ginger settles to the bottom.
Cut surfaces dull to brown after a day because of oxidation. A drizzle of fresh soy sauce refreshes the look. A sour or ammonia smell means toss it.
Seared Ahi Tuna Recipe FAQs
1. How far ahead can I prepare this for guests?
Sear and chill the fillets up to 8 hours ahead, then keep them covered in the fridge. Slice within 30 minutes of serving, because cut surfaces dull and dry out quickly. The sauce can be mixed a day early.
2. How spicy is the crust?
It is mild. Three-quarters of a teaspoon of black pepper and a scant ¼ teaspoon of white pepper give gentle warmth. Stir in extra wasabi, a pinch at a time, to raise the heat.
3. Which works better, yellowfin or bigeye?
Yellowfin is leaner, cheaper, and easier to find. Bigeye carries more fat, so it feels richer. Both sear well at 1 inch thick, so buy whichever looks deeper red and smells like clean seawater.
4. Should I trim the dark strip on the fillet?
Yes. The dark strip is blood-rich muscle with a stronger, metallic flavor. Slice it off with a thin knife before seasoning. Trimming costs about half an ounce per fillet and keeps the flavor clean.
5. Can I use a nonstick skillet?
Yes, at medium heat instead of medium-high, since most nonstick coatings are not meant for very high heat. Sear 50 seconds per side. Expect a lighter crust than cast iron gives, because the pan holds less heat.
6. Can I serve it warm right after searing?
You can, but warm flesh is soft and tears under the blade. Rest the fillet at least 10 minutes, which firms the slices. Expect the center to feel softer and warmer than the chilled version.
7. How do I clear the fishy smell from the kitchen?
Simmer 1 cup of water with 4 lemon slices for 10 minutes. Wipe the skillet with a paper towel while it is warm, then wash it in hot soapy water. Open a window for the first 5 minutes.
8. Do I need to toast the sesame seeds first?
No. They toast in the pan during the sear. Pre-toasted seeds turn dark and bitter within 40 seconds of high heat, so raw seeds are the safer pick.
Outback Steakhouse Seared Ahi Tuna Recipe
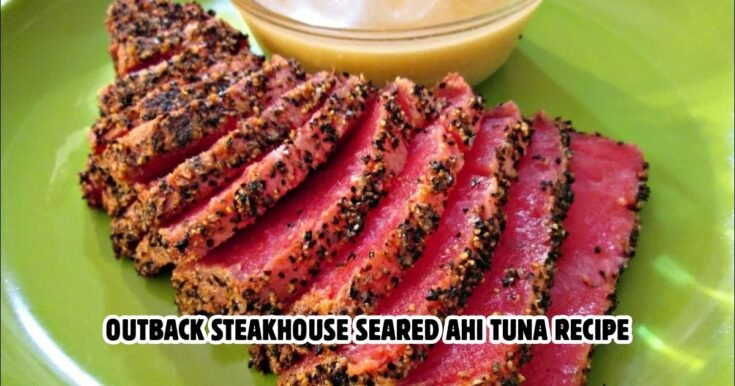
Outback Steakhouse Seared Ahi Tuna Recipe with a sesame pepper crust, a rare ruby center, and ginger soy sauce. Sear 40 seconds per side; ready in under 3 hours.
Ingredients
- 2 ahi tuna steaks, about 5 ounces each and 1 ¼ inches thick
- 1 tablespoon plus 1 teaspoon light olive oil
- 4 tablespoons low-sodium soy sauce, divided
- 1 tablespoon white sesame seeds
- 2 teaspoons black sesame seeds
- ¾ teaspoon coarse black pepper
- A scant ¼ teaspoon white pepper
- ½ teaspoon kosher salt
- ¾ teaspoon garlic powder
- ½ teaspoon ground ginger
- 1 teaspoon unseasoned rice vinegar
- ½ teaspoon freshly grated ginger
- ½ teaspoon wasabi paste, optional
- ¼ teaspoon toasted sesame oil
Instructions
- I moved the frozen blocks to the fridge the night before, about 11 hours. Then I patted both fillets with paper towels until the surface felt tacky. Skipping this once cost me the crust. Wet fish steams, and the seeds slid right off in the pan. Now I dry each side twice.
- With clean fingers, I rubbed 1 teaspoon of olive oil over both fillets, working over a plate to keep drips off the counter. Then I brushed on 2 teaspoons of soy sauce, leaving a glossy film with no pools.
- In a shallow dish, I stirred both sesame seeds and every spice together. Each fillet got pressed into the mix on all four long sides. Press firmly, since loose seeds fall into the pan. The coating should look speckled, with no bare red patches.
- My 10-inch Lodge sat over medium-high heat for 3 minutes. Then I added 1 tablespoon of olive oil and waited until it rippled and moved like water. A faint wisp of smoke means the pan is ready.
- I laid the fillets in the pan, away from me, and seared them 40 seconds per side. Then I tipped each onto its long edges for 15 seconds. The sizzle should stay loud, and a tan band about an eighth of an inch should climb the sides. Dark brown seeds mean the pan is too hot. Lift it off the burner for 20 seconds and wipe it.
- I moved them to a plate and let them rest for 10 minutes. Then I covered them loosely and chilled them for 2 hours and 15 minutes. Dale texted twice during the wait. A pressed fillet should feel firm and cold all the way through.
- While the tuna chilled, I whisked 3 tablespoons of soy sauce with the rice vinegar, grated ginger, and sesame oil. Wasabi goes in last, a pinch at a time. I tasted it on a spoon and added nothing.
- I cut each fillet against the grain into slices about ¼ inch thick, wiping the blade between cuts. Cold fish slices cleanly with one long pull of the knife. A last teaspoon of soy went over the top. The sauce sits alongside. Each cut face should show a ruby center ringed by a thin brown edge.
Nutrition Information:
Yield: 4 Serving Size: 1Amount Per Serving: Calories: 140
The best slice has a ruby center ringed by a thin tan edge and a crust that crackles under the knife. Four small choices earn that result: a dry surface, a hot skillet, a 40-second sear, and a long chill.
Dale finished the plate, tapped the empty sauce dish, and asked for the recipe before I had cleared the table.